Hello, my beautiful people! 😍
I love applying Nail Polishes and then there is something which I don't like when these get chipped. But the laziest thing which I feel is Removing Nail Polish. To fix my problem quickly every time I am making DIY Nail Polish Remover Jar, you can also say this Dip and Twist Magic Nail Polish Remover. It is extremely easy to make, only takes 5 minutes and is affordable. This will save you tons of time. Let's see how we can make it!!
Step 2. Now take both the pieces of sponge and wrap them around each other in a swirl configuration.
Step 3. Put the Sponges Roll tightly in the Jar. Make sure the roll should fit nice and snug, if not then add more sponge and again make a wrapped roll.
Step 4. Pour Nail Polish Remover in the Jar. Fill till sponges get completely wet and soggy.
Step 5. Add 10 to 15 drops of Almond Oil into the Jar. This will help your Nails and Cuticle little hydrated. Only add few drops not more otherwise Remover will not able to do their work properly.
Step 6. Close your Container with the Air-tight Cap.
- In easy words just dip your fingers one by one and twist them inside the Jar. :)
- It also works great or removing Dark Nail Polishes and Glitter Polishes.
Also, See - How To Perfectly Paint Your Nails
- Whenever Nail Remover dries out just add more Nail Remover onto the Jar.
- Always use a good quality Nail Polish Remover to avoid Cuticle damage.
- Always wash your finger after using the Nail Remover and then apply nice thick hydrating hand cream or cuticle cream.
I highly recommend trying this post. It is seriously very easy to use and saves you valuable time. If you try this post then don't forget to share your feedback with us.
I hope you found this post useful! If yes then please share it with your friends and family.
For more such DIYs stay tuned to Khushi's World. Follow me on Khushi's World Facebook Page, Instagram, and Pinterest. I will see you in the next post till then take care!!
I love applying Nail Polishes and then there is something which I don't like when these get chipped. But the laziest thing which I feel is Removing Nail Polish. To fix my problem quickly every time I am making DIY Nail Polish Remover Jar, you can also say this Dip and Twist Magic Nail Polish Remover. It is extremely easy to make, only takes 5 minutes and is affordable. This will save you tons of time. Let's see how we can make it!!
Dip and Twist Magic Nail Polish Remover | DIY
You Need -
- Small Air-tight Glass Container or Mason Jar with a screw-on lid
- Nail Polish Remover
- Few Drops of Almond Oil
- Sponge (I am using big Car Washing Sponge)
- Scissors or Cutter
Making Process -
Step 1. Cut the Sponge according to the size of your Container/Jar. For my Jar, I am cutting 2 big slices of sponge.Step 2. Now take both the pieces of sponge and wrap them around each other in a swirl configuration.
Step 3. Put the Sponges Roll tightly in the Jar. Make sure the roll should fit nice and snug, if not then add more sponge and again make a wrapped roll.
Step 4. Pour Nail Polish Remover in the Jar. Fill till sponges get completely wet and soggy.
Step 5. Add 10 to 15 drops of Almond Oil into the Jar. This will help your Nails and Cuticle little hydrated. Only add few drops not more otherwise Remover will not able to do their work properly.
Step 6. Close your Container with the Air-tight Cap.
How to use Nail Polish Remover -
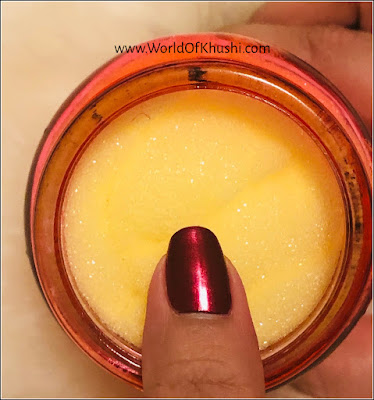
- Just insert your finger one by one into the center of the Rolled Sponges. Rub until all your Nail Polish is gone.- In easy words just dip your fingers one by one and twist them inside the Jar. :)
- It also works great or removing Dark Nail Polishes and Glitter Polishes.
Also, See - How To Perfectly Paint Your Nails
Pro Tips -
- After using your Nail Polish Remover Jar, always make sure you close your Jar properly, otherwise, the Nail Remover gets dry.- Whenever Nail Remover dries out just add more Nail Remover onto the Jar.
- Always use a good quality Nail Polish Remover to avoid Cuticle damage.
- Always wash your finger after using the Nail Remover and then apply nice thick hydrating hand cream or cuticle cream.
I highly recommend trying this post. It is seriously very easy to use and saves you valuable time. If you try this post then don't forget to share your feedback with us.
I hope you found this post useful! If yes then please share it with your friends and family.
For more such DIYs stay tuned to Khushi's World. Follow me on Khushi's World Facebook Page, Instagram, and Pinterest. I will see you in the next post till then take care!!


No comments:
Post a Comment
Note: Only a member of this blog may post a comment.